Installing RV Solar Panels on a Car: Step-by-Step Guide for 2025

Learn how to install RV solar panels on a car with this comprehensive, easy-to-follow guide. Discover the best equipment, installation tips, safety measures, and troubleshooting advice for reliable off-grid power.
Introduction
As more travelers seek freedom and sustainability, installing RV solar panels on a car has become a popular way to power on the go.
Whether you have a campervan, a car with a rooftop tent, or simply want to add solar energy capabilities for camping adventures, integrating a solar panel system on your vehicle offers unparalleled convenience and eco-friendly power.
This detailed guide covers everything from understanding your power needs to selecting the right components and step-by-step installation instructions, helping you set up a durable and efficient off-grid solar system on your car.
Why Install RV Solar Panels on Your Car?

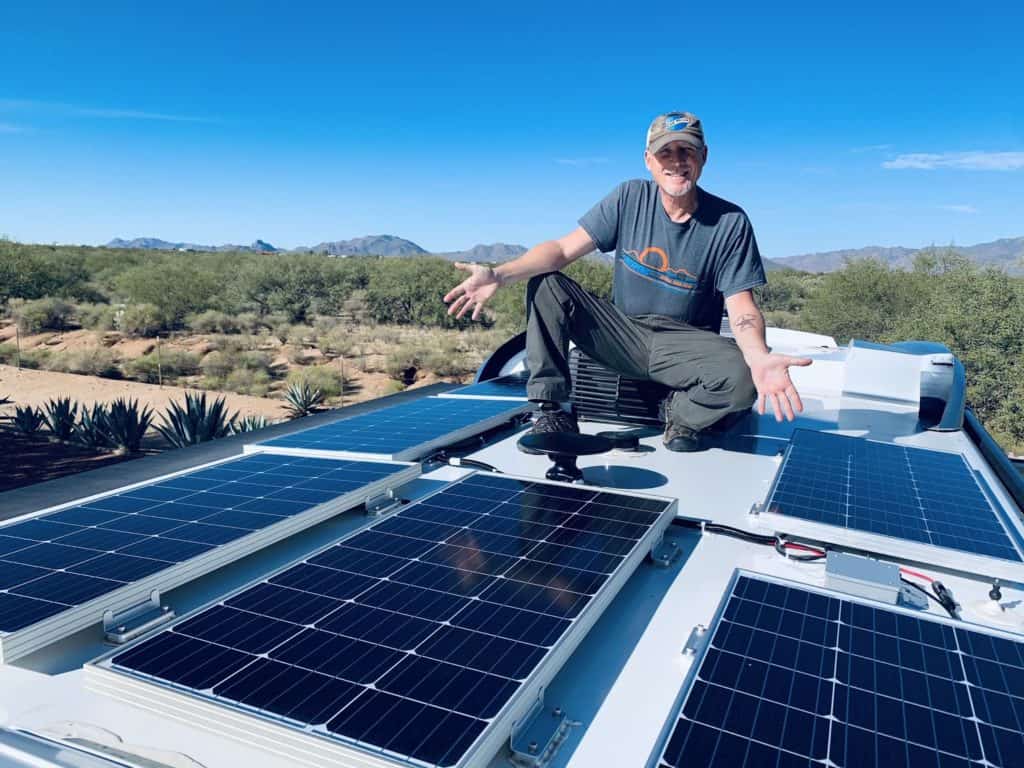
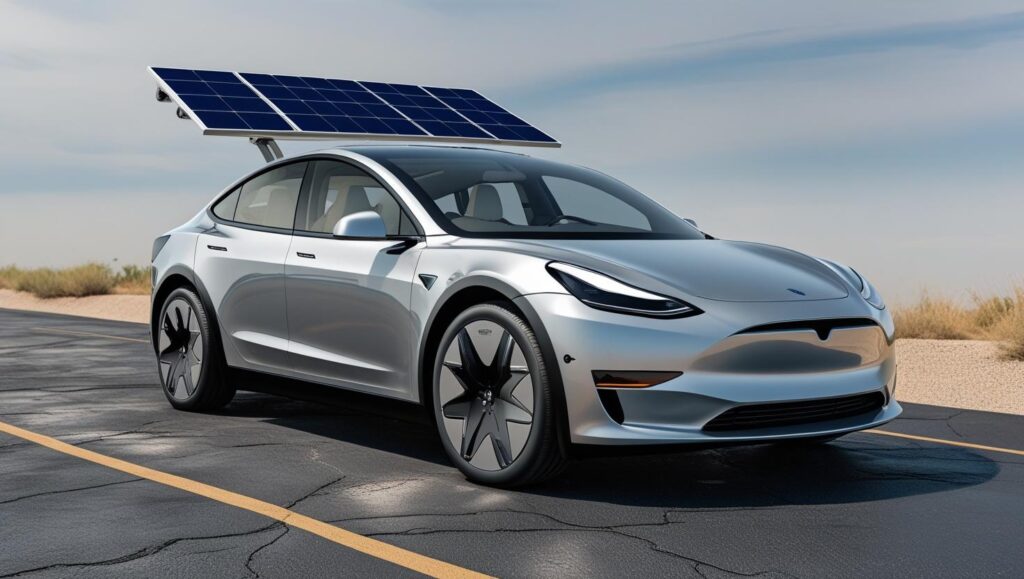
RV Solar Panel on a Car
Before diving into the installation process, it’s important to understand why solar panels are a smart choice for your vehicle:
- Off-Grid Power Freedom: Solar panels generate electricity wherever you park, freeing you from expensive or inconvenient electrical hookups.
- Energy for Essential Devices: Keep your lights, refrigerator, phone chargers, and other electronics running without draining your car battery.
- Quiet and Clean: Unlike noisy generators, solar panels work silently and produce zero emissions.
- Cost-Effective Over Time: After the initial investment, solar energy is free, reducing fuel and campsite electrical fees.
- Increased Travel Flexibility: Solar power lets you camp more remotely and stay off-grid longer.
Assessing Your Power Requirements
Before buying equipment, calculate your daily power consumption:
- List all devices you plan to power (lights, fans, fridge, phone, laptop).
- Note each device’s wattage and daily usage hours.
- Multiply wattage by hours to find watt-hours per device, then sum for total daily energy use.
This estimate guides how many solar panels, batteries, and what size inverter you need.
Components Needed for Car Solar Installation
Your RV solar setup on a car generally includes:
- Solar Panels: Usually monocrystalline or flexible panels suited for limited roof space.
- Charge Controller: Regulates panel output to safely charge the battery bank without overcharging.
- Battery Bank: Stores energy so you can use power when the sun isn’t shining. Lithium or AGM batteries are common choices.
- Inverter: Converts DC power from batteries to AC power for conventional devices (optional if using only DC devices).
- Wiring and Connectors: Proper gauge wires, fuses, and weatherproof connectors to ensure safe electrical flow.
- Mounting Hardware: Brackets or adhesive mounts designed for vehicle roofs.
Step-by-Step Guide to Installing RV Solar Panels on Your Car
Step 1: Plan Your Installation
- Determine panel placement to maximize sun exposure without blocking vents or antennas.
- Measure roof space and weight capacity to choose appropriate panels and mounts.
- Design wire runs from panels to battery and controller, planning for the shortest and safest paths.
Step 2: Prepare the Roof
- Clean the area thoroughly to ensure good adhesion or secure mounting.
- For adhesive mounts, follow the manufacturer’s instructions carefully.
- For bracket mounts, mark and drill holes cautiously, sealing any penetrations to prevent leaks.
Step 3: Install the Solar Panels
- Secure panels using selected mounting hardware or adhesive.
- Ensure panels are firmly attached to withstand driving vibrations and wind.
Step 4: Wire the Panels
- Connect solar panels in series or parallel based on your system voltage requirements.
- Use appropriate gauge wires and protect them inside conduit or raceways when possible.
- Install inline fuses or circuit breakers close to the panel for safety.
Step 5: Install the Charge Controller and Battery
- Mount the charge controller near the battery bank in a dry, accessible location.
- Connect panel wires to the controller, then connect controller outputs to the battery bank.
- Observe correct polarity to avoid permanent damage.
Step 6: Connect the Inverter (If Needed)
- Connect the inverter terminals to the battery bank using heavy-gauge cables.
- Place the inverter in a ventilated, secure location accessible for maintenance.
- Plug your AC devices into the inverter.
Step 7: Test the System
- Check all connections with a multimeter for correct voltage and polarity.
- Verify panels produce expected voltage and current in sunlight.
- Confirm the charge controller displays charging status and battery voltage.
- Test powering devices on the inverter or DC system.
Safety Tips for the Installation of RV Solar Panels on a Car
Installing RV solar panels on your car can be a rewarding project, providing you with clean, off-grid electricity. However, working with electrical systems and mounting equipment on your vehicle’s roof involves risks.
Following safety best practices during installation protects both you and your vehicle, ensuring your solar system operates reliably and safely for years to come.
Here are the key safety tips to follow when installing RV solar panels on a car:
1. Disconnect the Vehicle Battery Before Starting Work
- Why: Your car’s 12V battery powers the vehicle’s electrical system. Connecting or disconnecting components with the battery connected risks electrical shorts, sparks, or damage to sensitive electronics.
- How: Before beginning any wiring or electrical work, disconnect the negative terminal of your vehicle battery to prevent accidental currents that can cause shocks, fires, or damage.
- Tip: Use insulated tools and avoid metal jewelry to reduce shock risk while working on electrical components.
2. Use Correct Wire Gauges and Quality Materials
- Why: Using wires that are too thin for the current load can cause overheating, power loss, and potentially electrical fires.
- Guideline: Refer to electrical wire gauge charts to select wire sizes rated for your system’s maximum current. For typical RV solar setups, common wire sizes range from 10 to 14 gauge, depending on distance and amp load.
- Components: Use wires, connectors, and fuses rated for automotive and outdoor use, ensuring they are weatherproof, UV-resistant, and able to withstand vibration and temperature changes.
3. Install Proper Fuses and Circuit Breakers
- Purpose: Fuses and circuit breakers protect your wiring and devices from electrical surges or faults by breaking the circuit if current exceeds safe levels.
- Placement: Install fuses or breakers close to the battery and at critical points in the system, such as between solar panels and the charge controller.
- Selection: Choose fuse ratings appropriate for the wire gauge and expected current to avoid nuisance trips or lack of protection.
- Tip: Never bypass or replace fuses with higher-rated ones to prevent fires or equipment damage.
4. Avoid Roof Leaks with Proper Mounting and Sealants
- Challenge: Installing brackets or drilling holes for solar mounts can lead to water leaks on your vehicle’s roof, causing interior damage and corrosion.
- How to Prevent:
- Use high-quality, UV-resistant sealants like silicone or butyl tape on all drilled holes and seams.
- Consider adhesive mounting systems or low-profile brackets that minimize roof penetrations.
- Regularly inspect seals and mounts for wear, resealing as needed.
- Tip: Test for leaks with water spray immediately after installation to catch and fix any gaps.
5. Protect Against Electrical Shorts and Moisture
- Why: Shorts can cause fires, and moisture intrusion can corrode components or cause malfunctions.
- Best Practices:
- Use waterproof connectors for all external connections and panel wiring.
- Encase wiring in conduit or protective sleeves where it passes through or under the vehicle.
- Secure wires firmly with cable clamps or zip ties to prevent chafing and movement.
- Tip: Choose connectors and components with an IP65 rating or higher for dust and water resistance.
6. Follow Manufacturer Instructions Closely
- Why: Every solar panel, charge controller, inverter, and battery brand can have unique installation requirements and safety warnings.
- How: Read all included manuals and datasheets before starting. Adhering to specified voltage, current, and wiring protocols ensures safe and efficient operation.
- Tip: Keep manuals handy throughout installation for quick reference.
7. Work with a Partner or Get Professional Help
- Safety Benefit: Having someone assist you reduces the risk of injury during rooftop work and wiring. A helper can hand you tools, hold components, and help with ladders.
- When to Get Professionals:
- If unfamiliar with electrical systems or uncomfortable with roof work.
- For complex multi-panel arrays or integrating with a vehicle’s existing electrical system.
- When local laws require certified installation.
- Tip: Electrical mistakes can be costly and dangerous; professional help is a worthy investment.
8. Use Personal Protective Equipment (PPE)
- Essential PPE:
- Insulated gloves when handling electrical wires.
- Safety glasses to protect eyes from debris when drilling or sealing.
- Non-slip footwear and a safety harness for rooftop work.
- Tip: Always prioritize your personal safety, especially on slippery or elevated surfaces.
9. Verify Polarity and Connections Twice
- Why: Reversing polarity (connecting positive to negative) can damage electronic components instantly.
- How:
- Use a multimeter to check voltage and polarity before connecting batteries or devices.
- Color-code wires (red for positive, black for negative) consistently.
- Tip: Label wires and connectors during setup for easy troubleshooting and future maintenance.
10. Maintain Good Ventilation for Batteries and Inverters
- For Health and Safety: Lead-acid batteries can emit harmful gases. Inverters generate heat during operation.
- Best Practices:
- Install batteries in well-ventilated compartments away from the living space.
- Mount inverters in locations with airflow to prevent overheating.
- Tip: Follow the manufacturer’s recommendations on clearance around electrical devices.
Final Safety Checklist Before Powering Up
- Battery disconnected during setup and reconnected last.
- All fuses and breakers are installed and functional.
- Wires secured, insulated, and properly sized.
- Roof mounts sealed and checked for water tightness.
- Polarity verified with a multimeter.
- Devices and appliances are turned off during initial power-up.
- The emergency disconnect switch is accessible if available.
Electrical safety precautions
Regular Inspections: Inspect connections and wiring for wear and tear, and address any issues promptly
Wear protective equipment: Gloves, goggles, and appropriate clothing are essential when dealing with electricity and working on the roof.
Disconnect Power: Always disconnect the power before working on electrical components.
Insulate connections: Ensure all electrical connections are secure and properly insulated to prevent potential fire hazards or system failure.
Route Cables: Keep cables away from moving parts and sharp edges to prevent damage.
Following these safety tips ensures your solar installation on your car is not only effective but also safe and durable.
Taking the time to prepare carefully and respecting electrical safety standards protects your investment, prevents accidents, and gives you peace of mind to enjoy your solar-powered adventures.
Maintaining Your Car, RV, Solar System
- Regularly clean solar panels to remove dust and debris for maximum efficiency.
- Inspect wiring and connectors for wear or corrosion.
- Monitor battery health and water levels if not using sealed batteries.
- Update system components as needed to keep performance optimal.
Troubleshooting Common Issues
- No power output: Check panel connections, fuse status, and sunlight exposure.
- Battery not charging: Verify controller wiring, battery voltage, and test with a known working battery.
- Inverter problems: Ensure proper wiring, a ventilated environment, and check for overload conditions.
Final Thoughts/Conclusion
Installing RV solar panels on a car empowers you to embrace the lifestyle of flexible, sustainable travel with reliable off-grid electricity. Following this guide ensures you build a safe, efficient system tailored to your needs.
With the right planning, components, and care, your solar-powered car will become a self-sufficient haven wherever your adventures lead.
FAQ: Installing RV Solar Panels on a Car
Most cars with suitable roof space can be fitted, but size and mounting options vary. Campervans and SUVs are common choices.
DIY installations typically take 1-3 days, depending on complexity and experience.
Usually no, but confirm local regulations and road safety compliance.
